Jump menu
- Add Managed System
- Create partition
- Add resources to partition
- Add Virtual Device (to partition created above)
- Activate partition
- Open virtual console
- Mobility Operations
In the previous sessions we learned of the HMC in (HMC and system setup) and then moved on to learning a bit more about the HMC with (Learning the HMC). We now move on to actually creating and controlling LPARs. You will first navigate to the HMC (using gui). This is typically done by accessing it as: https://hmc_fqdn_or_ipaddress
note: Replacing the hmc_fqdn_or_ipaddress with the Fully Qualified Domain Name or IP address
Example:
https://hmc01.example.com or https://192.168.1.84
Using the HMC may be daunting at first to the uninitiated. However, once you spend a bit of time in there, and start to navigate around you’ll get pretty comfortable with the interface.
The super user account that is created by default is called hscroot and the password probably varies depending on your organization. Google can be your friend to find a default hscroot password. The older HMCs used to have a “Classic Interface”. However, that has been removed. The only web interface now is called Enhanced+. As such, this website will no longer show the information for the classic interface.
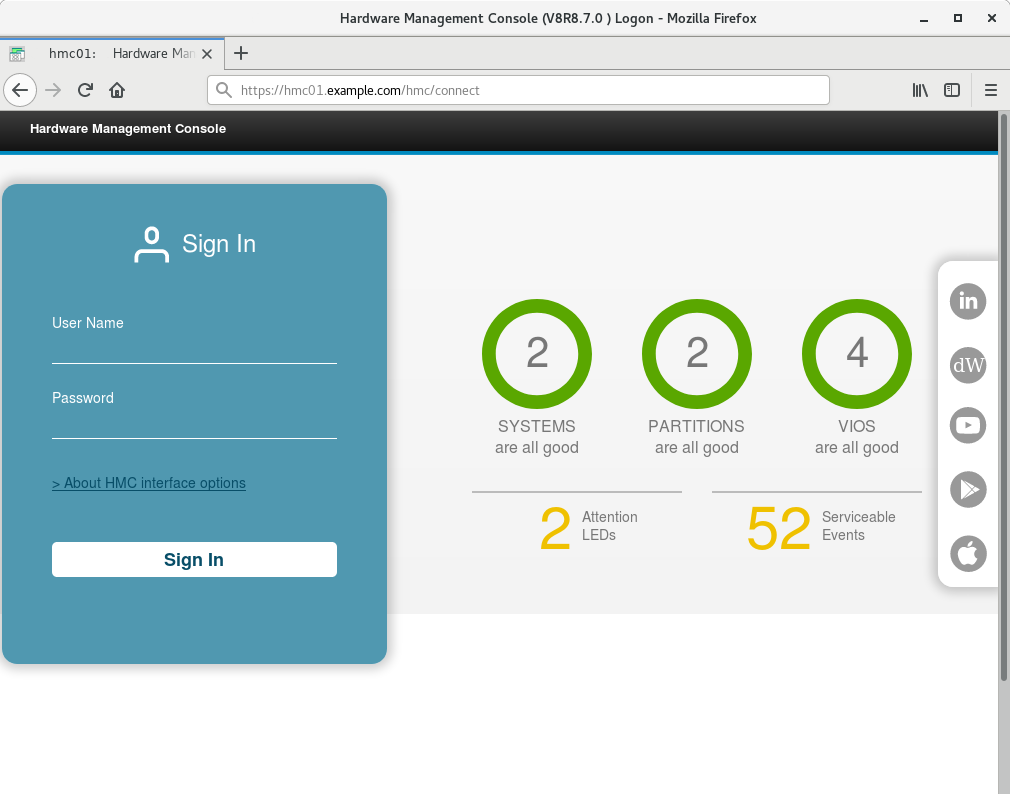
Once you are logged in, you will have access to everything within the HMC. See fig 2 below.
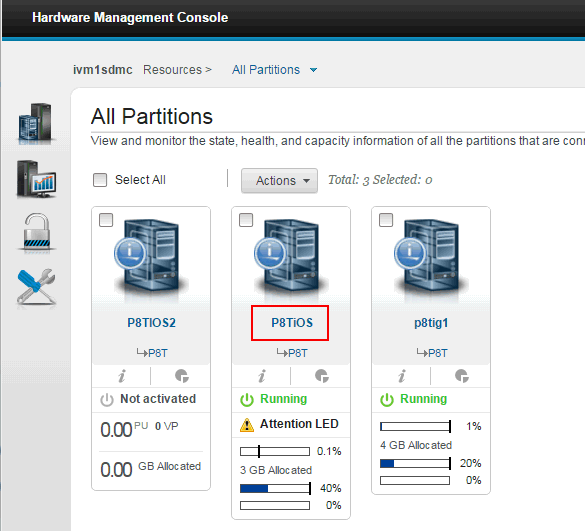
Typically, one already has one (or more) managed servers in the HMC. If not, here are the steps to add a managed system into the HMC.
Add Managed System
This may of been covered in Learning the HMC already. So you may of already added a managed system, if not, feel free to add one (or more) now. Log into the HMC. By default, you will be under “All Systems”. Once there, in the main menu bar right of the All Systems text you will see a button labelled: “Connect Systems”. Click on that button, and you will get a new pop-up window (see figure 3 below).
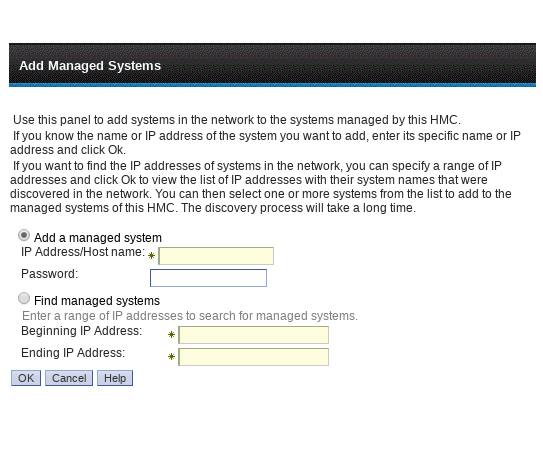
Under the “Add a managed System” text box. Enter the IP address or FQDN of the system you wish to add. Alternatively, perform a search using the “find managed systems” radio button, providing the start and end IP address range.
Create Partition (aka LPAR)
Creating a partition may require a 2-step process. However, with newer iterations of the enhanced+ web interface, you may be able to accomplish everything you need with just the “Create a partition” task. To create a partition, navigate to:
Resources, All Systems, select a managed system.
You will be under “Partitions”, and a button labelled “Create Partition” will be accessible. Click on that, and you will see a screen similar to the one below in fig 4.
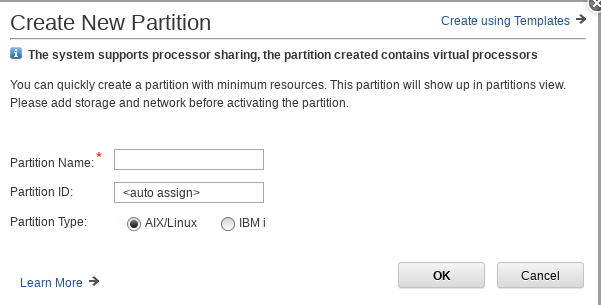
The version of the HMC, may dictate what options are present when you “create a partition”. On some versions, you can create the partition, and accomplish everything you need in that window. On older HMC versions, you may have to create the partition and then modify the partition properties to get the intended result. At a bare minimum you will provide the “Partition Name”, “Partition ID”, and “Partition Type”. The partition name should be unique.
Add resources to partition
During the course of running a partition, it may be desirable to add / remove resources from a running partition. The available resources for adding / removing are CPU, memory, physical adapters and virtual adapters. To achieve this, one would navigate to “Resources, All Partitions”, select the check-box next to the partition you wish to modify, Click Actions and select “view partition properties”. You then have the ability to add resources, such as “Processors, Memory, storage, networking”. The save operation will make the save dynamically, and save to the partitions profile (if partition is running, and not in “SMS”.
NOTE: The LPAR communicates with the HMC using a sub-system referred to as Remote Management and Control (RMC). If RMC is not functioning properly you will be "unable" to make dynamic changes. You will have to fix up the "RMC" functionality to regain this ability. Additionally, you can't make any dynamic changes to an LPAR if the LPAR is booted into the SMS menu.
Adding Virtual Devices
When modifying partition properties (or managing the profile), one can add virtual devices. However, it would be pertinent to have an understanding of virtual networks, virtual SCSI and virtual optical devices first. These are covered in the VIOS section of this website, specifically here.
Once you are familiar with virtual devices, you can then add the resource to the partition. Some things you’ll get accustomed to adding are “virtual networks (vlan)”, “virtual optical devices”, “Virtual storage, using NPIV/vscsi/SSP/file_backed storage” depending on how things were original configured. Once you have these things, you can easily create a partition. Usually at a minimum one has CPU, memory, ethernet and some storage.
Activating a Partition
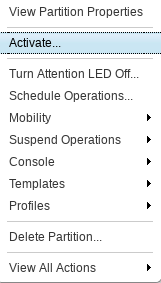
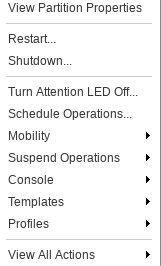
One can activate (power on) a LPAR from the HMC. When the partition is powered off (not activated), you select the partition by navigating to “Resources, All Partitions” and placing a check-box in the check-box area for the intended partition. You then click on the actions button. If the partition is “not activated”, then one of the actions you can perform is “activate” the partition. If the partition is already active, that default action is replaced with the options of “restart” or “shutdown”. As per fig 7a and 7b below.
Open Virtual Console
One can utilize a virtual console to get command-line interface access to the LPAR. This is useful to install an OS, perform maintenance on the OS, or perhaps to do work with the networking on the OS. In the web GUI, navigate to: “Resources, All Partitions”. Select the checkbox next to the desired partition, select Actions, Console, Open Terminal Window.
Another method of opening a virtual console is to ssh to the HMC device, and open a console from there, by running the command “vtmenu”. Then selecting the manage system, and partition you wish to open a console to. Alternatively, some opt to use a more powerful script called ezh. This tools has quite a bit more functionality for the cli, using menus. This has recently started to be maintained by Matthew Opoka at: https://github.com/opokam/eezh
The EEZH maintained above, is an original fork from Brian Smith.
Note: Only one remote virtual console can be opened to a specific partition at a time. Closing exisiting remote virtual console sessions can be done using the gui or cli.
Mobility Operations
The mobility section is where one can perform migrations to another system. Sometimes you will need to evacuate one or more partitions to another managed system. This can be for failing hardware, applying firmware, etc. Regardless, you will want to be familiar with the process. When migrating to similar systems, you typically provide the information then perform a migration. The migration can be done live, thus mitigating the need for an outage window. For a “Live Partition Mobility” operation it will require a few things, the most basic being the partition has to be on the network with an IP address configured, RMC running and communication properly.
In order to be able to do migrations, the partition will need to be configured with completely virtual resources. If you have allocated specific IO resource(s) to the partition, it may have to be migrated normally (incurring a downtime). Also, if there are any virtual optical device, you will get a warning about them if you attempt to migrate the live. You will probably have to remove them PRIOR to performing the LPM (Live Partition Mobility) operation. You start out, by navigating to the partition you want to migrate, select the check-box by the partition, click on the Actions button, Mobility, then select Validate.
A new window will popup like the image below. One would indicate the Remote HMC to use, the remote user (typically hscroot), destination system (typically a different managed server), destination profile name. If the system should be under a different shared processor pool, ensure to select that PRIOR to performing the LPM. When ready, click the “Validate” button to start the validation process.
If everything looks good, you can click the migrate button to perform a Live Partition Migration to another managed server.